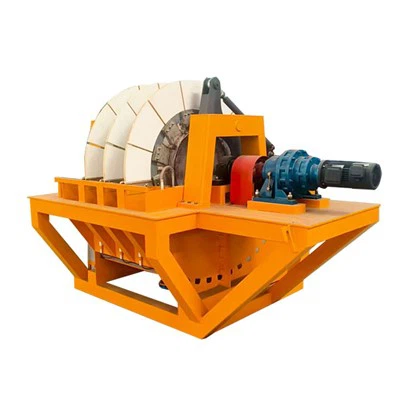
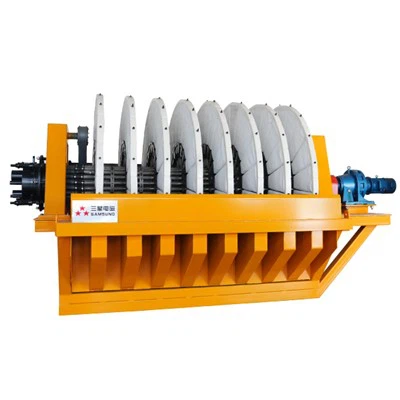
Hey there! As a supplier of electromagnetic magnetic separators, I often get asked about the installation process of these nifty machines. Today, I'm gonna break it down for you in a simple and easy-to-understand way.
First off, let's talk a bit about what an electromagnetic magnetic separator is. These bad boys are used to separate magnetic materials from non-magnetic ones in a variety of industries, like mining, recycling, and food processing. They work by creating a powerful magnetic field that attracts and holds onto the magnetic particles while allowing the non-magnetic ones to pass through.
Now, let's get into the nitty-gritty of the installation process.
Step 1: Site Preparation
Before you even think about installing your electromagnetic magnetic separator, you need to make sure the site is ready. This means finding a suitable location that's level, stable, and has enough space for the separator and any associated equipment. You also need to ensure that there's proper ventilation, as these machines can generate a fair amount of heat.
Check the floor or surface where you'll be placing the separator. It should be able to support the weight of the machine, especially when it's fully loaded. If necessary, you might need to reinforce the floor or use a special mounting platform.
Step 2: Unpacking and Inspection
Once you've got the perfect spot picked out, it's time to unpack the separator. Carefully remove it from its packaging and inspect it for any damage that might have occurred during shipping. Look for dents, scratches, or loose parts. If you find anything amiss, contact your supplier right away.
While you're at it, take a good look at all the components that came with the separator. Make sure you have everything you need for the installation, including bolts, nuts, wiring, and any additional accessories.
Step 3: Mounting the Separator
Now comes the fun part - actually mounting the separator. Depending on the type of separator you have, the mounting process can vary a bit.
For an Electromagnetic Overband Separator, you'll typically need to install it above a conveyor belt. Use the provided brackets and bolts to secure it in place, making sure it's centered and level. You'll also need to connect the drive motor and the control panel according to the manufacturer's instructions.
If you've got an RCDB Dry Electromagnetic Separator, it might be installed in a hopper or a chute. Again, follow the installation guide to ensure it's properly positioned and fastened. You'll also need to connect the power supply and any other necessary wiring.
The Air-cooled Self-unloading Electromagnetic Separator usually requires a more complex installation. You'll need to mount it in a specific orientation and connect the cooling system, the conveyor for the removed magnetic materials, and the control unit.
Step 4: Electrical Connections
Electrical connections are a crucial part of the installation process. You need to make sure that all the wiring is done correctly to avoid any safety hazards or malfunctions.
First, connect the separator to a suitable power source. Make sure the voltage and current ratings match the requirements of the machine. Use proper electrical cables and connectors, and follow all the local electrical codes and regulations.
Next, connect the control panel. This is where you'll be able to adjust the settings of the separator, like the magnetic field strength and the operating time. The control panel should come with a detailed wiring diagram, so make sure you follow it carefully.
Step 5: Testing and Calibration
Once everything is installed and wired up, it's time to test the separator. Before you start, double-check all the connections and make sure there are no loose wires or parts.
Turn on the power and let the separator run for a few minutes. Check for any unusual noises, vibrations, or overheating. If everything seems to be working fine, you can start feeding some material through the separator.


Observe how well the separator is separating the magnetic and non-magnetic materials. If you're not getting the desired results, you might need to calibrate the settings. You can adjust the magnetic field strength, the speed of the conveyor (if applicable), and other parameters to optimize the performance.
Step 6: Training and Maintenance
After the separator is up and running, it's important to train your staff on how to operate and maintain it properly. Provide them with the user manual and go over the key points, like how to start and stop the machine, how to adjust the settings, and how to perform basic maintenance tasks.
Regular maintenance is essential to keep the separator in good working condition. This includes cleaning the magnetic surface, checking the electrical connections, and lubricating the moving parts (if any). Follow the manufacturer's recommended maintenance schedule to ensure the longevity of the machine.
Why Choose Our Electromagnetic Magnetic Separators?
At our company, we take pride in offering high-quality electromagnetic magnetic separators that are designed to meet the needs of various industries. Our separators are built with the latest technology and are known for their reliability, efficiency, and durability.
We also provide excellent customer support. If you have any questions about the installation process, or if you need any help with maintenance or troubleshooting, our team of experts is always here to assist you.
If you're in the market for an electromagnetic magnetic separator, or if you have any questions about our products, don't hesitate to get in touch. We're happy to discuss your specific requirements and help you find the perfect solution for your business.
References
- Manufacturer's installation and operation manuals for electromagnetic magnetic separators.
- Industry standards and best practices for the installation and use of magnetic separation equipment.